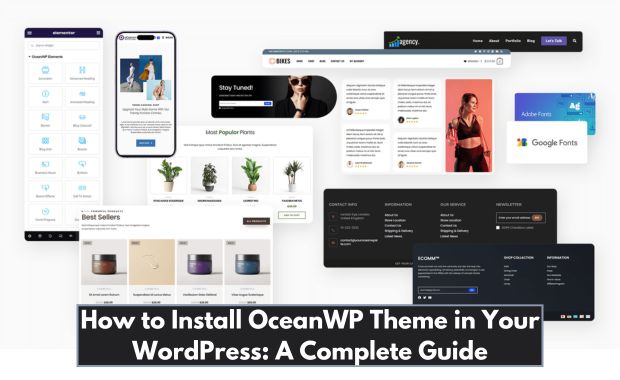
OceanWP is one of the most popular WordPress themes, known for its lightweight design, versatility, and compatibility with major page builders like Elementor and Beaver Builder. Whether you’re creating a blog, eCommerce store, or portfolio, OceanWP provides all the tools needed to design a beautiful and functional website.
In this article, we’ll guide you through installing and configuring the OceanWP theme. From initial setup to customization tips, this guide ensures your website is ready to shine.
1. What is OceanWP?
OceanWP is a free, multipurpose WordPress theme designed to work seamlessly with various plugins and page builders. It offers: How to Install Avada Theme in Your WordPress.
- Extensive Customization Options: From layouts to typography and colors.
- eCommerce Features: WooCommerce-ready with specialized features like floating add-to-cart bars.
- Fast Performance: Lightweight coding ensures quick loading times.
- Responsive Design: Looks great on any device.
OceanWP is a go-to theme for developers and beginners alike, offering both free and premium extensions.
2. Requirements for OceanWP Installation
Before installing OceanWP, ensure your WordPress setup meets these minimum requirements:
| Requirement | Specification |
|---|---|
| WordPress Version | 5.0 or higher |
| PHP Version | 7.4 or higher |
| MySQL Version | 5.6 or higher |
| Memory Limit | 128 MB or more |
| Hosting Environment | Supports WordPress standards |
A reliable hosting provider like Bluehost or SiteGround can improve your website’s performance significantly.
3. Where to Download OceanWP
OceanWP is available for free on the WordPress repository. You can also access premium features and extensions via the official OceanWP website.
Steps to Download:
- Visit the WordPress dashboard.
- Navigate to Appearance > Themes > Add New.
- Search for “OceanWP” in the search bar.
- Click Install and activate the theme.
For premium features, purchase the OceanWP Pro package and download the zip files from your account dashboard.
4. How to Install OceanWP Theme
You can install the OceanWP theme using two primary methods: via the WordPress dashboard or FTP. How to Install Astra Theme in Your WordPress.
A. Installing via WordPress Dashboard
- Log in to your WordPress admin panel.
- Go to Appearance > Themes > Add New.
- Search for “OceanWP” in the search bar.
- Click Install and then Activate.
B. Installing via FTP
- Download the OceanWP theme zip file from the WordPress repository or OceanWP website.
- Extract the file on your computer.
- Use an FTP client (e.g., FileZilla) to connect to your website.
- Navigate to
wp-content/themes. - Upload the extracted OceanWP folder.
- Log in to WordPress, go to Appearance > Themes, and activate OceanWP.
5. Installing OceanWP Required Plugins
OceanWP works best with its companion plugins. After activating the theme, you’ll be prompted to install these plugins: How to Install Newspaper Themes in WordPress.
- Ocean Extra: Adds theme panel options and enhances functionality.
- Elementor (Optional): For drag-and-drop page building.
- WooCommerce (Optional): For eCommerce websites.
Steps to Install Plugins:
- Navigate to Appearance > Install Plugins.
- Select the required plugins and click Install.
- After installation, click Activate.
6. Importing OceanWP Demo Content
OceanWP offers pre-built demo sites to speed up the website creation process.
Steps to Import Demo Content:
- Install and activate the Ocean Demo Import plugin.
- Go to Theme Panel > Install Demos.
- Browse the available demos and click Import on your chosen design.
- Select the content to import (e.g., pages, widgets, and settings).
- Wait for the process to complete.
Note: Some demos may require premium extensions.
7. Customizing OceanWP Settings
OceanWP provides extensive customization options via the WordPress Customizer.
Steps to Customize:
- Navigate to Appearance > Customize.
- Adjust the following settings:
| Section | Customization Options |
| General Options | Layouts, container width, and page styles. |
| Typography | Font families, sizes, and colors. |
| Colors | Customize background, header, and text colors. |
| Header/Footer | Configure the header layout and footer widgets. |
| Menus | Add navigation menus and links. |
8. Optimizing Performance
OceanWP is lightweight, but additional steps can ensure faster loading times: How to Install Divi Theme in Your WordPress.
| Optimization Task | Description |
| Enable Caching | Use plugins like WP Rocket or W3 Total Cache. |
| Compress Images | Optimize images with Smush or ShortPixel. |
| Minify CSS and JS | Use Autoptimize to reduce file sizes. |
| Utilize a CDN | Deliver content faster using Cloudflare. |
| Update Plugins and Theme | Keep all components up to date. |
9. Troubleshooting Common Issues
Here are solutions to frequent problems when installing or using OceanWP:
| Issue | Solution |
| “Stylesheet Missing” Error | Ensure you’re uploading the correct .zip file. |
| Demo Import Fails | Increase PHP memory limit and execution time. |
| Slow Loading Pages | Optimize images and enable caching. |
| Plugin Conflicts | Deactivate plugins to identify the culprit. |
10. FAQs
Q1: Is OceanWP free?
A: Yes, OceanWP is free, but premium extensions are available for advanced features.
Q2: Can I use OceanWP with page builders?
A: Absolutely! OceanWP is compatible with popular builders like Elementor, Beaver Builder, and Brizy.
Q3: How do I update OceanWP?
A: Updates can be done via the WordPress dashboard under Dashboard > Updates.
Q4: Is OceanWP suitable for eCommerce sites?
A: Yes, OceanWP is WooCommerce-ready and offers unique eCommerce features.
Conclusion
Installing OceanWP is a straightforward process that empowers you to create stunning, responsive, and professional websites. Its flexibility and compatibility with major plugins make it a favorite among WordPress users.
By following this guide, you’ll have your OceanWP theme installed, customized, and optimized in no time. Start exploring its features today to bring your website vision to life!