Speed and performance are crucial factors for any successful website. The LiteSpeed Cache plugin for WordPress is a powerful tool designed to optimize your website, reduce loading times, and enhance the overall user experience. In this beginner’s guide, we’ll take you step-by-step through the setup process for the LiteSpeed Cache plugin in 2025, helping you unlock its full potential for your WordPress site.
Why Use LiteSpeed Cache for WordPress?
LiteSpeed Cache (LSCache) is a highly effective plugin that integrates seamlessly with LiteSpeed Web Server, delivering advanced caching features and optimization tools. Here’s why it’s a favorite among WordPress users: WooCommerce for WordPress.
Benefits of LiteSpeed Cache:
| Feature | Benefit |
|---|---|
| Server-Level Caching | Faster than standard PHP-based caching plugins. |
| Image Optimization | Reduces image sizes without compromising quality. |
| Database Optimization | Cleans up your database to improve site performance. |
| Content Delivery Network (CDN) Integration | Enhances global content delivery with ease. |
| Mobile-Specific Caching | Delivers optimized content for mobile users. |
Prerequisites for Using LiteSpeed Cache
Before diving into the setup, ensure you meet the following requirements:
- LiteSpeed Web Server: LSCache works best on servers running LiteSpeed Web Server or OpenLiteSpeed. Check with your hosting provider.
- WordPress Installed: A WordPress site with admin access.
- Backup System: Regular backups ensure safety while making changes to your site.
How to Install LiteSpeed Cache Plugin
Step 1: Install the Plugin
- Log in to your WordPress dashboard.
- Go to Plugins > Add New.
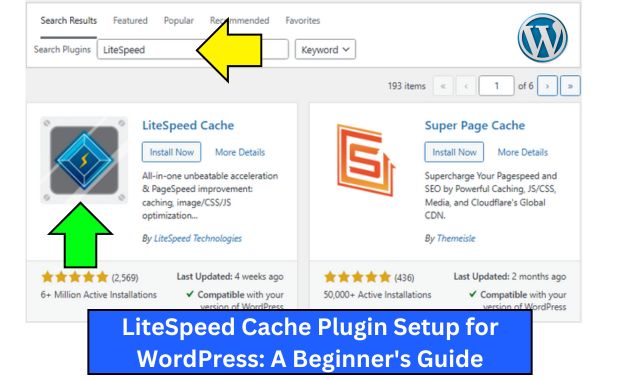
- Search for “LiteSpeed Cache.”
- Click Install Now and then Activate.
Step 2: Verify Server Compatibility
After activation:
- Navigate to LiteSpeed Cache > General.
- Check the server status under the General Settings tab. Ensure your server is compatible with LiteSpeed features.
LiteSpeed Cache Setup: Step-by-Step
1. General Settings
- Go to LiteSpeed Cache > General.
- Enable the following options:SettingRecommended ValueEnable LiteSpeed CacheONAutomatically UpgradeON (to ensure you receive the latest features and fixes)
2. Cache Settings
Navigate to LiteSpeed Cache > Cache:
| Setting | Description |
| Enable Cache | Turn ON caching for your entire site. |
| Mobile Cache | Enable mobile-specific caching to optimize for different devices. |
| Logged-in User Cache | Optional; enable if your site has registered user logins. |
| Object Cache | Enable for dynamic sites like e-commerce. |
| TTL (Time to Live) | Set a TTL of 3600 seconds for cached pages. |
3. Image Optimization
- Navigate to LiteSpeed Cache > Image Optimization.
- Click Send Optimization Request to optimize existing images.
- Enable automatic optimization for newly uploaded images.
Benefits of Image Optimization:
| Metric | Before Optimization | After Optimization |
| Image Size | 500 KB | 250 KB |
| Page Load Time | 2.5 seconds | 1.3 seconds |
4. Minification and Combination
Navigate to LiteSpeed Cache > Page Optimization:
- CSS Settings:
- Minify CSS: ON
- Combine CSS: ON
- JavaScript Settings:
- Minify JS: ON
- Combine JS: ON
- HTML Settings:
- Minify HTML: ON
Example Performance Impact:
| Metric | Without Minification | With Minification |
| Page Size | 1.5 MB | 1.2 MB |
| Requests | 75 | 50 |
Advanced Settings
1. Content Delivery Network (CDN) Integration
If you use a CDN like Cloudflare, integrate it with LiteSpeed Cache:
- Navigate to LiteSpeed Cache > CDN.
- Enable CDN support and configure the following:
- CDN URL: Add your CDN-provided URL.
- Include Directories: Specify directories to cache (e.g., wp-content/uploads).
2. Database Optimization
Clean up your database for better performance:
- Navigate to LiteSpeed Cache > Database.
- Enable the following options:
- Clean all post revisions.
- Remove expired transients.
- Optimize tables.
3. Heartbeat Control
Reduce server resource usage by limiting WordPress Heartbeat API activity:
- Go to LiteSpeed Cache > Advanced.
- Adjust the Heartbeat frequency for optimal performance.
Performance Testing and Monitoring
After setting up LiteSpeed Cache, test your website’s performance using tools like:
| Tool | URL |
| Google PageSpeed Insights | https://pagespeed.web.dev |
| GTmetrix | https://gtmetrix.com |
| Pingdom Tools | https://tools.pingdom.com |
Sample Performance Report:
| Metric | Before LSCache | After LSCache |
| Page Load Time | 3.2 seconds | 1.4 seconds |
| Performance Score | 75 | 95 |
| Requests | 85 | 50 |
Troubleshooting Common Issues
| Issue | Solution |
| Plugin Not Functioning Properly | Verify server compatibility and update to the latest plugin version. |
| Images Not Optimizing | Check your API usage limit or re-request image optimization. |
| Slow Loading Pages | Clear the cache and recheck minification settings. |
| Compatibility Errors | Disable conflicting plugins or contact LiteSpeed support for assistance. |
LiteSpeed Cache vs. Other Caching Plugins
| Feature | LiteSpeed Cache | W3 Total Cache | WP Super Cache |
| Server-Level Caching | Yes | No | No |
| Image Optimization | Yes | No | No |
| CDN Integration | Yes | Yes | Yes |
| Ease of Use | High | Medium | High |
Best Practices for Using LiteSpeed Cache
- Regularly Clear Cache: Clear your cache after significant updates to your site.
- Backup Before Changes: Always backup your site before adjusting LiteSpeed settings.
- Monitor Performance: Use performance tools regularly to ensure your site remains optimized.
- Combine with Security Plugins: Pair LiteSpeed Cache with security plugins like Wordfence for a robust setup.
Frequently Asked Questions (FAQs)
Q1. Is LiteSpeed Cache free?
Yes, LiteSpeed Cache is free to use, but some advanced features require LiteSpeed Web Server Enterprise.
Q2. Can I use LiteSpeed Cache with shared hosting?
Yes, as long as your hosting provider supports LiteSpeed Web Server or OpenLiteSpeed.
Q3. How does LiteSpeed Cache improve SEO?
LiteSpeed Cache improves site speed, which is a critical ranking factor for search engines. Faster loading times also enhance user experience, reducing bounce rates.
Conclusion
Setting up LiteSpeed Cache on WordPress is a straightforward process that offers significant benefits, from faster page loads to improved SEO rankings. By following this beginner-friendly guide, you can unlock the full potential of the LiteSpeed Cache plugin and deliver a top-tier user experience on your WordPress site. How to Use Moz SEO Tool.
Start optimizing your site with LiteSpeed Cache today and enjoy the rewards of a faster, more efficient website in 2025! Elementor Plugin on WordPress.