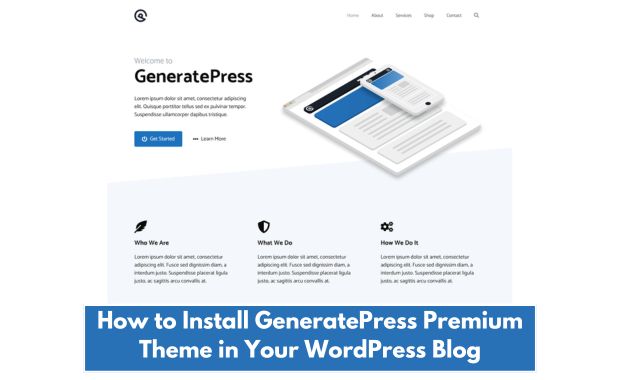
GeneratePress is one of the most popular lightweight and customizable WordPress themes, favored by bloggers and developers alike for its performance and flexibility. If you’ve decided to elevate your WordPress blog by installing GeneratePress Premium, you’re making an excellent choice! This guide will walk you through the entire process of installing and activating the GeneratePress Premium theme, with detailed steps, tables for easy reference, and tips to enhance your experience.

What is GeneratePress Premium?
GeneratePress Premium is the paid add-on for the free GeneratePress theme. While the free version offers a solid foundation, the premium add-on unlocks advanced customization features, layout controls, and modules like:
- Site Library: Pre-designed templates for different niches.
- Colors and Typography: Enhanced design control.
- WooCommerce Integration: Optimized design for online stores.
- Elements Module: Create custom layouts, headers, and hooks.
Prerequisites
Before starting, ensure you meet the following requirements:
| Requirement | Details |
|---|---|
| A WordPress Blog | Your site must already have WordPress installed. |
| GeneratePress Free Version | Install and activate the free GeneratePress theme. |
| Premium License Key | Purchase GeneratePress Premium and obtain your key. |
Step-by-Step Guide to Installing GeneratePress Premium
Here’s a detailed breakdown of the installation process:
1. Purchase GeneratePress Premium
- Visit the official GeneratePress website.
- Click on the Pricing tab and choose a plan that suits you.
- Complete the purchase process, and you’ll receive an email with:
- Your account details.
- A download link for the premium plugin.
- Your license key.
2. Install the Free GeneratePress Theme
Before activating Premium, ensure the free theme is installed.
- Log in to your WordPress dashboard.
- Go to Appearance > Themes.
- Click Add New and search for “GeneratePress.”
- Click Install and then Activate.
3. Download the GeneratePress Premium Plugin
- Log in to your GeneratePress account.
- Navigate to the Downloads section.
- Download the
gp-premium.zipfile to your computer.
Note: Do not extract the ZIP file. Upload it as-is.
4. Upload and Install the Premium Plugin
- Go to Plugins > Add New in your WordPress dashboard.
- Click Upload Plugin and select the
gp-premium.zipfile. - Click Install Now and then Activate Plugin.
You’ll see the “GP Premium” plugin in your active plugins list.
5. Activate Your License Key
- Navigate to Appearance > GeneratePress.
- Enter the license key you received via email.
- Click Activate License.
Understanding GeneratePress Modules
Once the Premium plugin is activated, you’ll gain access to multiple modules. These modules allow you to enable or disable specific features to optimize your site’s performance.
| Module | Purpose |
| Site Library | Access pre-designed templates for quick site creation. |
| Colors | Customize the colors of every element on your site. |
| Typography | Choose from hundreds of Google Fonts and customize font sizes, weights, and more. |
| WooCommerce | Add advanced styling options for WooCommerce stores. |
| Elements | Build custom hooks, layouts, and headers. |
To enable a module:
- Go to Appearance > GeneratePress.
- Toggle the switch next to the module name.
Customizing Your Site with GeneratePress Premium
GeneratePress Premium is all about customization. Here are some key areas you can explore: How to Create a WordPress Website.
1. Importing a Pre-Built Site from the Site Library
- Go to Appearance > GeneratePress > Site Library.
- Browse through the templates and select one that fits your niche.
- Click Import and follow the prompts.
Tip: Importing a site will overwrite existing content. Backup your site before proceeding.
2. Customizing Colors and Typography
- Navigate to Appearance > Customize.
- Access the Colors and Typography panels.
- Experiment with different settings to match your brand’s aesthetics.
3. Creating Custom Elements
The Elements module is a powerful tool for creating custom layouts and hooks.
- Go to Appearance > Elements.
- Click Add New and select the type of element you want (e.g., Header, Hook).
- Use the editor to create unique designs or functionality.
Troubleshooting Common Issues
Here are solutions to potential issues you might encounter:
| Issue | Solution |
| License key not activating | Ensure your key is correct and hasn’t expired. Contact support if the issue persists. |
| Modules not showing up | Check if the GP Premium plugin is activated. |
| Imported site looks broken | Clear your browser cache and regenerate thumbnails using a plugin like Regenerate Thumbnails. |
Benefits of GeneratePress Premium
Speed and Performance
GeneratePress is lightweight, ensuring fast loading times and a great user experience.
SEO-Friendly Design
Its clean code structure ensures better indexing by search engines, boosting your site’s visibility.
Flexibility and Customization
From layout controls to hooks, GeneratePress Premium allows you to design your site exactly how you want it.
Summary Table: Key Steps
| Step | Description |
| Purchase GeneratePress Premium | Buy from the official website and get your license. |
| Install Free GeneratePress Theme | Set up the foundation by activating the free theme. |
| Upload GP Premium Plugin | Install and activate the premium plugin. |
| Activate License Key | Unlock all premium features. |
| Customize Your Site | Use modules like Site Library and Elements. |
Final Thoughts
Installing GeneratePress Premium on your WordPress blog is a straightforward process that unlocks a world of customization and performance benefits. Whether you’re a blogger, developer, or entrepreneur, GeneratePress provides the tools to create a stunning and functional website. By following this guide, you can seamlessly set up the theme and start exploring its full potential.